


When unexpectedly confronted with a roof leak or damage, having the knowledge and skills to install a tarp can be a lifesaver. This guide provides an in-depth explanation on how to tarp a roof effectively, ensuring you protect your home from further damage. Using strategic SEO-rich headings, detailed step-by-step instructions, and a conversational tone, this article will walk you through a successful roofing tarp installation.
Understanding the Importance of Tarping a Roof
Roof damage can arise from various causes, including severe weather, fallen trees, or general wear and tear. When a roof is compromised, tarping provides a temporary solution to prevent water infiltration and additional structural damage. Proper installation can safeguard your home's interior from mold, water damage, and further complications.
Gather Your Materials
To tarp your roof effectively, having the right materials on hand is crucial. Here's what you'll need:
- Heavy-duty tarp: Select a durable and waterproof material, preferably UV-resistant.
- Roofing nails or screws: Use fasteners that will securely hold the tarp in place.
- Wooden strips (1x2s or 2x4s): These will help reinforce your tarp and prevent flapping in the wind.
- Ladder: Ensure it's safe and stable to reach the damaged area.
- Safety harness and gear: Always prioritize safety when working at heights.
- Hammer or power drill: Essential for installing fasteners.
- Utility knife: For cutting the tarp to the desired size.
- Gloves: Protect your hands during installation.
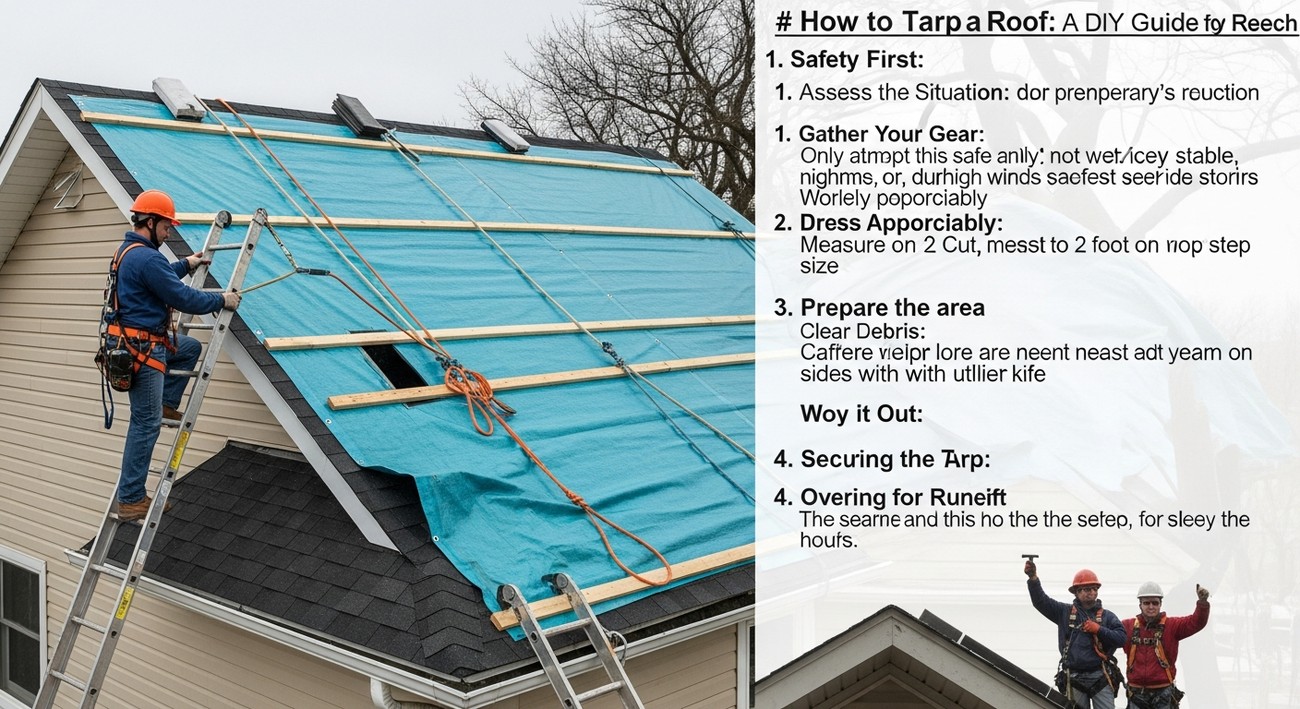
Safety First: Precautions Before You Start
Before starting any roof work, it's vital to recognize the potential hazards and take preventive measures:
Check Weather Conditions: Avoid tarping during high winds or thunderstorms as it could pose significant safety risks.
Ensure Roof Stability: Make sure the roof can safely support your weight. If unsure, consult a professional.
Use Safety Gear: Equip yourself with a harness and non-slip footwear to prevent accidents.
Work with a Partner: Having another person around provides added safety and assistance.
Step-by-Step Guide to Tarp a Roof
Step 1: Assess the Damage
Start by evaluating the extent of the roof damage. Identify where the leaks are and measure the area that needs to be covered. Take note of any sharp or rough edges that could potentially tear the tarp.
Step 2: Prepare the Tarp
Unroll the tarp and cut it to the required size, ensuring it covers the damaged area completely with an additional two to three feet on all sides for secure fastening.
Step 3: Position the Tarp
Carefully carry the tarp to the roof and position it over the damaged section. Ensure there is even coverage around the entire affected area. An extra few feet of tarp can be tucked under shingles or eaves to provide additional security against wind.
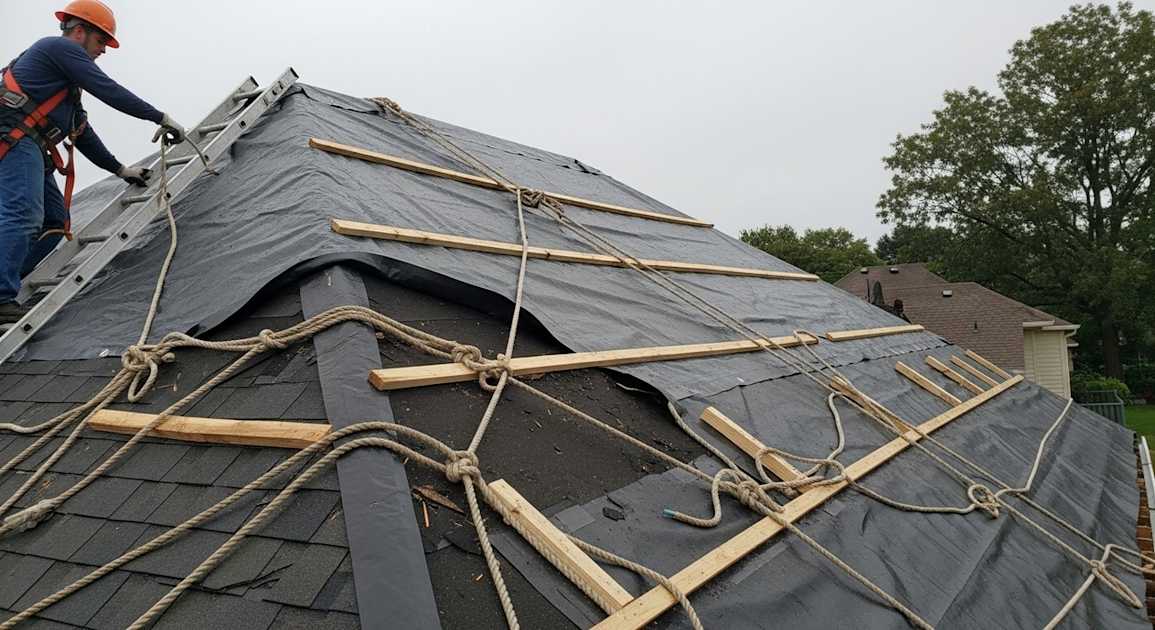
Step 4: Secure with Wooden Strips
Lay wooden strips over the edges of the tarp, approximately two feet apart. These strips will help secure the tarp and prevent it from catching wind.
- Use a hammer or power drill to fasten roofing nails or screws through the strips and into the roof. Ensure each strip is tightly secured to prevent movement.
- Begin with the highest point of the tarp and work your way down.
Step 5: Nail the Tarp
Securely fasten the tarp directly to the roof using nails or screws at four to five feet intervals. This ensures the tarp sits tightly against the roof surface, reducing the risk of wind damage.
Step 6: Inspect for Gaps
Conduct a thorough inspection to ensure there are no gaps or unsecured sections. Adjust as necessary, since even a small gap can cause water to seep through, defeating the tarp's purpose.
Maintain Your Temporary Roof Cover
After the tarp is securely in place, regularly check its condition, especially after severe weather events. Address any signs of wear promptly to maintain protection until permanent repairs can be made.
How to Tarp a Roof: Frequently Asked Questions
How do I prepare my roof before laying down a tarp?
Before you begin tarping your roof, make sure to inspect and prepare the area thoroughly. Remove debris like leaves, branches, and any other obstructions. Check for loose shingles and secure them if possible. It's crucial to assess the severity and location of the damage to determine the appropriate size and placement of your tarp.
What materials do I need to tarp a roof effectively?
To tarp a roof effectively, gather essential materials such as a durable tarpaulin (preferably heavy-duty and waterproof), a ladder, wooden 2x4s, a utility knife, roofing nails or screws, and a hammer or cordless drill. Safety gear like work gloves and non-slip shoes are also vital to ensuring a safe working environment.
Which type of tarp should I use for my roof?
Selecting the right tarp is crucial for adequate protection. Choose a heavy-duty, waterproof poly tarp, ideally UV-resistant, to withstand various weather conditions. The tarp should be large enough to extend over the damaged area by at least three feet on each side to provide effective coverage and reduce the risk of leaks.
How do I safely climb onto the roof to install a tarp?
Safety should always be your priority when installing a tarp on your roof. Use a sturdy, extendable ladder positioned on stable ground. It can be helpful to have a spotter to hold the ladder steady. Wear non-slip shoes to maintain your footing and consider using a roof harness for added safety if available.
What are the steps to securely attach a tarp to my roof?
Begin by unrolling your tarp over the damaged section of your roof, allowing it to cover the area completely. Secure the tarp's edges by nailing or screwing wooden 2x4s along the perimeter. Begin by affixing a wooden beam along the top edge, then stretch the tarp taut and secure it with beams along the sides and bottom edge. Ensure the tarp is tight to prevent wind from getting underneath and causing it to flap or tear.
Should I use nails or screws to secure the tarp?
When securing your tarp, screws are generally more reliable and easier to remove once repairs are needed. Roofing nails can also be used but be mindful that they might be harder to take out without damaging shingles. If using screws, opt for ones with rubber washers to create a waterproof seal.
How long can a tarp stay on the roof?
While tarping is a temporary solution, a well-secured and durable tarp can last between three to six months, depending on weather conditions and how well it was installed. Nonetheless, strive to schedule permanent repairs as soon as possible to prevent further damage to the roof structure beneath.
Can tarping a roof prevent further water damage?
Yes, tarping a roof can provide a temporary shield against water damage. By effectively covering the damaged areas, tarps help prevent rainwater from penetrating your roof, safeguarding your home’s interior. However, it's imperative to monitor the tarp regularly to ensure no tears or shifts compromise its protective barrier.
What should I do if the tarp is not large enough to cover the entire damaged area?
If you find that a single tarp is not large enough to cover the entire damaged area, you can overlap multiple tarps. Ensure at least an 18-inch overlap between them, and secure each overlap using roofing nails or screws. Take the same care in securing overlapping sections as you would with the edges, as this can be a vulnerable point for leaks.
Is it necessary to remove any snow or water on the tarp?
Regularly removing accumulated snow or standing water from the tarp is essential to maintain its effectiveness and longevity. Excess weight can cause the tarp to sag, create pressure points that lead to tears, or force water underneath. Use a broom or similar tool to gently remove snow or water build-up.
What are common mistakes to avoid when tarping a roof?
Common mistakes in roof tarping include using a thin or lightweight tarp, failing to secure the tarp tautly, and inadequate overlap if using multiple tarps. Another frequent issue is neglecting safety measures, leading to accidents. Always ensure your tarp is appropriate for the job, secured correctly, and prioritize safety throughout the process.
Step-by-Step Guide
Tools/Materials Needed
Before you begin, gather the following tools and materials:
- Durable roofing tarp (at least 4 mil thick)
- Ladder
- Measuring tape
- Utility knife or heavy-duty scissors
- Hammer or hammer tacker
- 1x3 or 1x4 wooden planks (for batten boards)
- Roofing nails (or screws with washers if using a power drill)
- Safety harness and helmet
- Work gloves
- Boots with good grip
- Flashlight (if working in low light)
Having everything ready will make the process smoother and quicker.
Preparation Steps
Assess the Damage: Inspect the roof from a safe distance or from within your attic. Identify all the damaged areas you'll need to cover.
Measure the Area: Use your measuring tape to find out the dimensions of the problem areas. Add at least 3 feet to each side to ensure proper coverage and prevent water from seeping under the tarp.
Check Weather Conditions: Plan to tarp your roof during dry and calm weather to avoid risks associated with wind and rain.
Plan Your Approach: Decide on the safest and most efficient way to reach and cover the damaged area.
Detailed Instructions
Wear Safety Gear: Put on your safety harness, attach it securely, and wear your helmet and gloves.
Secure the Ladder: Position your ladder on even ground and ensure it's stable. Climb with caution, holding tools securely.
Prepare the Tarp: Roll out your tarp on the ground first. Use your utility knife or scissors to cut it to the measured size if necessary.
Position the Tarp: With the help of another person, drape the tarp over the damaged area. Ensure it extends past the damaged area by at least 3 feet on all sides.
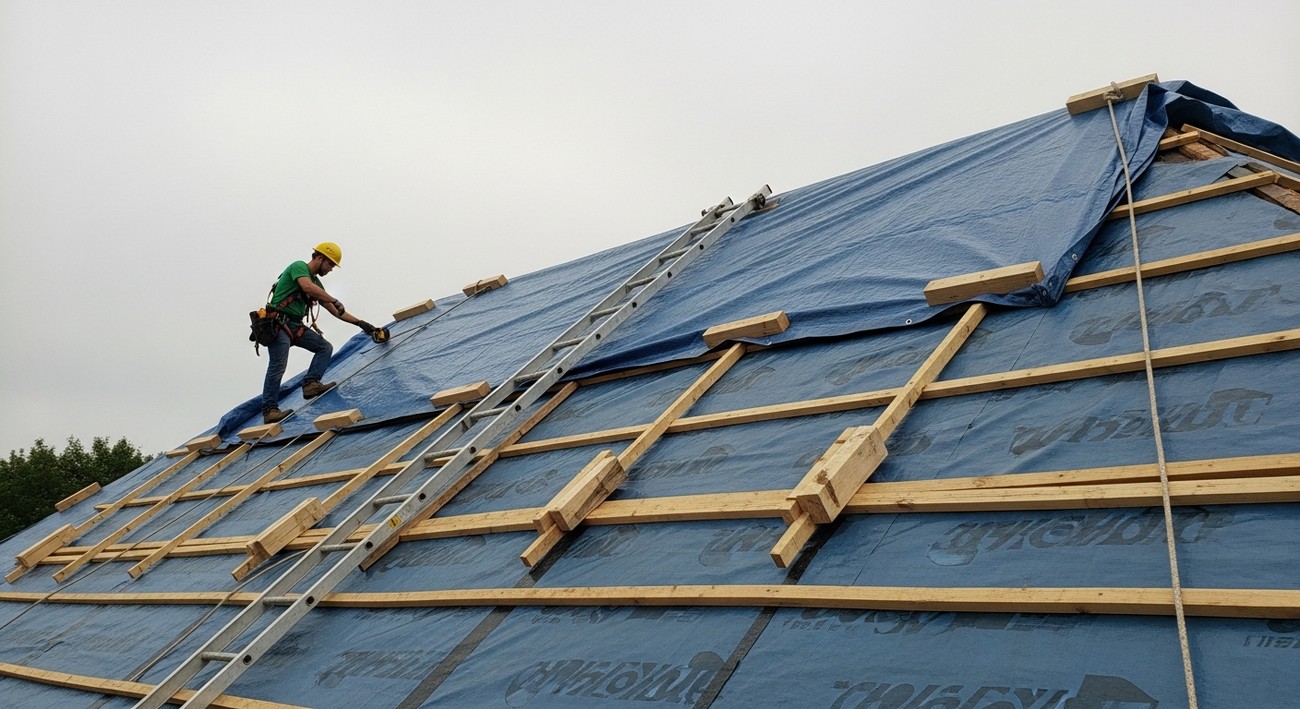
Place Batten Boards: Roll the edges of the tarp over the pieces of 1x3 or 1x4 wooden planks. This way, you'll create a firm edge to nail into.
Secure the Tarp: Using your hammer and roofing nails (or screws with washers), fix the batten boards to the roof on all sides, starting from the apex and working downwards. Make sure the nails or screws penetrate the wooden deck of your roof without damaging any underlying structures.
Check for Tautness: Ensure there's no slack in the tarp. A tightly stretched tarp will better withstand wind.
Double-Check Fixing: Go over all nailed areas to ensure everything is secure and won’t be easily displaced by wind.
Tips for Success
Help Is Valuable: Bring a friend or family member on board. Having an extra hand, especially when handling large tarps, goes a long way.
Stay Cautious in Wind: A large tarp can act as a sail. Avoid tarping if you’re dealing with strong gusts as it can lead to dangerous situations.
Roof Condition Awareness: Consider the condition of your roof surface. A worn-out roof can pose additional risks, from slipping to instability.
What to Do if Something Goes Wrong
- Immediate Danger: If you start to slip or feel unsafe, stop immediately and assess the situation. Don’t hesitate to descend and try another day, rechecking your safety measures.
- Tarp Tears: If the tarp tears during the installation, consider applying duct tape temporarily, then reassess the damage. Patching may hold as a temporary solution, but replacing with a new section of tarp is best for long-term coverage.
- Nail/Screw Issues: In situations where nails don’t hold, or planks move, try using longer nails or additional screws. Placing them at an angle can sometimes improve grip.
Common Mistakes to Avoid
1. Using Improperly Sized Tarps
Why it happens: Homeowners often underestimate the size needed to properly cover the necessary area, leading them to purchase tarps that fall short.
How to avoid it: Measure your roof area carefully, taking into account extra edges to overlap safely with the undamaged roof sections. Purchase a tarp slightly larger than the area that needs covering to ensure full coverage.
What to do if you've already made the mistake: If you're already on the roof with an undersized tarp, use multiple tarps to cover the area or acquire a larger one. Be sure to overlap the tarps by at least 12 inches to prevent leaks.
Expert recommendation: Professionals always suggest that erring on the side of too much tarp is better than not enough. Having extra coverage can help secure the tarp more effectively against strong winds.
2. Skipping Protective Gear
Why it happens: In the rush to stop water damage, safety precautions can be overlooked.
How to avoid it: Prioritize protective gear including gloves, non-slip boots, and a safety harness. Have all safety gear ready before you start the task to prevent the temptation to skip it.
What to do if you've already made the mistake: If you find yourself working without safety gear, pause your task immediately and obtain the necessary equipment. Your safety is worth a short delay.
Expert recommendation: Experts stress that no job should come at the expense of personal safety. Invest in a quality safety harness designed for roofing tasks.
3. Not Securing the Tarp Properly
Why it happens: Overconfidence or lack of understanding in how wind interacts with loose coverings can lead to a poorly secured tarp.
How to avoid it: Secure the tarp with ropes, nails, or screws around the edges, using wooden planks or sandbags if necessary to hold it in place. Make sure to pull the tarp snugly to minimize wind lift.
What to do if you've already made the mistake: If your tarp is flapping in the wind, go back and secure it more tightly with additional fasteners. Check each corner and edge thoroughly.
Expert recommendation: Roofing professionals suggest using button cap nails or roofing nails with washers to secure tarps reliably.
4. Ignoring Weather Forecasts
Why it happens: Urgency to fix a problem can lead to starting a project without considering incoming weather conditions.
How to avoid it: Always check the weather forecast before starting. Calm, dry days are best for tarping work, minimizing the risk posed by wind and rain.
What to do if you've already made the mistake: If caught unexpectedly in inclement weather, prioritize securing the tarp quickly before it worsens, and plan for enhanced stabilization measures like additional sandbags.
Expert recommendation: Professionals often advise against working on the roof in windy or stormy conditions altogether.
5. Using Damaged Tarps
Why it happens: Reusing old materials or choosing second-hand supplies can lead to using tarps with holes or tears.
How to avoid it: Inspect your tarps thoroughly before installation. Look for any signs of wear or damage, especially in previously used ones.
What to do if you've already made the mistake: Replace any damaged sections of the tarp immediately. If it's not feasible to replace the entire tarp, patch up small areas with duct tape or tarp patches.
Expert recommendation: Seasoned experts suggest investing in a heavy-duty, UV-resistant tarp, which stands up better to the elements and provides longer-term protection.
6. Overlooking Roof Anchors
Why it happens: A lack of knowledge about proper anchoring techniques can result in the tarp blowing away quickly. How to avoid it: Use professional-grade roof anchors or edge anchors. These provide enhanced stability compared to basic DIY solutions. What to do if you've already made the mistake: If your tarp has come loose, re-anchor it with additional anchoring devices or utilize more permanent solutions like screws or nails. Expert recommendation: Rely on commercial roof anchoring kits for added safety against extreme weather conditions, as noted by industry experts.
Final Thoughts
When learning how to tarp a roof, we want you to remember that a well-secured tarp can make all the difference in protecting your home from water damage until a more permanent fix can be arranged. With the right materials and techniques, even a temporary solution can keep your home secure, especially during those unpredictable weather events we often experience here in Lexington, KY.
If you find yourself needing assistance or just want to ensure your roofing issues are handled properly, we’re here to help at US Quality Construction of Lexington. Whether you want to schedule a consultation or request a free estimate, our team of local experts is ready to provide the support you need. Don’t hesitate to reach out and let us take care of your roofing needs!
Tags: roof tarping, roof protection, DIY home repair,


