


Pavers can dramatically enhance the beauty of your outdoor spaces, providing a polished look and practical benefits. However, ensuring their longevity and maintaining their appearance requires proper care, especially sealing. If you're wondering how to seal pavers, you've come to the right place. In this guide, we'll delve into the step-by-step process of sealing pavers, why it's essential, and tips to get the best results. Let's dive into this informative journey toward making your outdoor areas stunning and durable.
Why Seal Your Pavers?
Before we get into the how-to, let's tackle the why. Sealing pavers is crucial because:
- Protection From The Elements: Pavers are continuously exposed to weather conditions like rain, sun, and frost. Sealing them creates a protective barrier against harsh elements.
- Prevents Stains: Sealing helps prevent the absorption of stains from oils, leaves, and dirt, keeping pavers looking clean and vibrant.
- Enhances Color: A good sealant will enhance the natural colors of your pavers, giving them a richer and more vibrant appearance.
- Inhibits Weed and Ant Growth: Sealing can help reduce the opportunity for weeds and ants to disrupt the surface integrity of your paving.
- Increases Longevity: By protecting the surface of your pavers, sealing them can increase their lifespan significantly.
Choosing The Right Sealant
Selecting the correct sealant is one of the essential steps in sealing pavers. Here's what to consider:
- Type of Paver Material: Different sealants are designed for different materials. Make sure your choice matches the paver material (e.g., concrete, brick, stone).
- Finish: Decide on the finish you want — glossy, semi-gloss, or matte. Keep in mind that glossier finishes tend to highlight the natural colors more vividly.
- Quality: Invest in a high-quality sealant for the best protection and longevity.
What You Will Need
Before you start sealing your pavers, gather the necessary supplies:
- Paver sealant
- Pressure washer or garden hose
- Stiff-bristled brush or broom
- Stone cleaner or mild detergent
- Protective equipment (gloves, mask, safety glasses)
- Sealant applicator: roller, sprayer, or brush
Preparing the Pavers
Clear the Area
Begin by removing all furniture, planters, and debris from the paver area. This step ensures that nothing obstructs the cleaning and sealing process.
Clean Thoroughly
- Remove Dirt and Grime: Use a pressure washer to eliminate any mold, mildew, or dirt. If a pressure washer is unavailable, a garden hose and a stiff-bristled brush can also work effectively.
- Use Detergent: Apply a stone cleaner or a mild detergent mixed with water for stubborn stains. Scrub these stained areas with a brush.
- Rinse and Dry: Thoroughly rinse any cleaning agents off the pavers and allow them to dry completely. This drying period is critical, as sealing wet pavers can lead to poor results.
Applying the Sealant
Check Weather Conditions
Ensure you choose a day when the weather is clear and dry with temperatures between 50°F to 90°F (10°C to 32°C). Avoid days when rain is expected within 24 hours.
Start Sealing
- Read Instructions: Before you begin, carefully read the manufacturer's instructions on the sealant container.
- Test a Small Area: Apply sealant to a small, inconspicuous area to ensure it delivers the desired finish and the surface reacts positively.
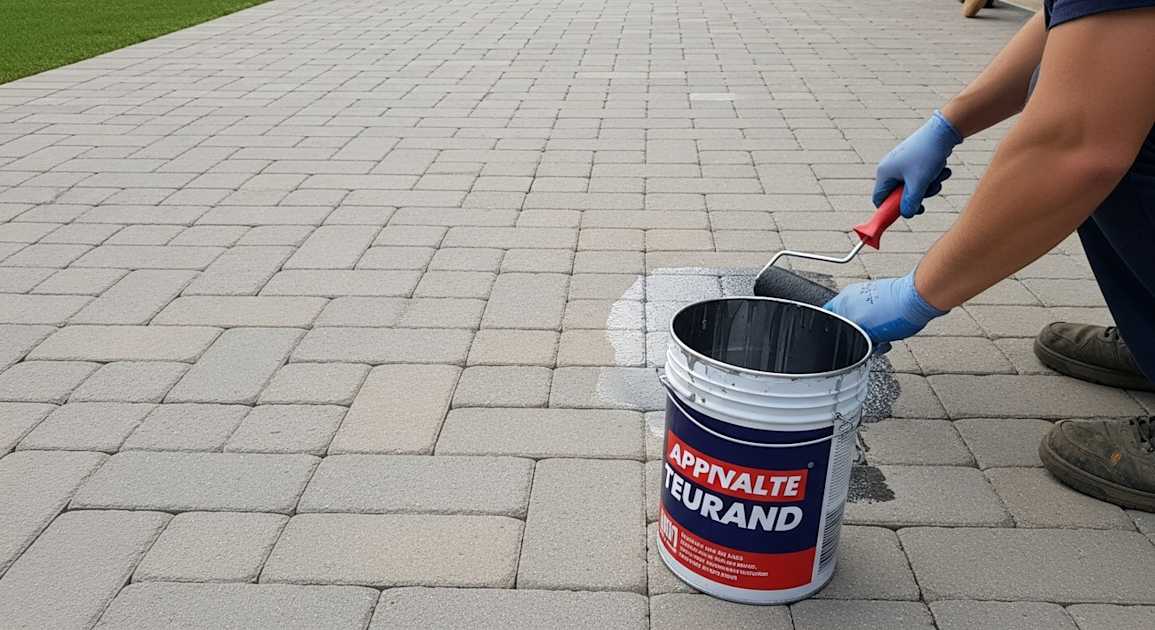
- Apply the First Coat: Using a roller, sprayer, or brush, apply the sealant evenly over the paver surface, ensuring coverage in all joints and pores.
- Avoid Over-Application: Apply a thin layer to prevent pooling or streaking.
- Allow to Dry: Let the first coat dry according to the manufacturer's instructions.
Apply a Second Coat
After the first coat has dried, consider applying a second coat for enhanced protection. Repeat the previous application steps, ensuring even and thorough coverage. Double coating is especially useful for high traffic areas.
Aftercare Tips
- Immediate Care: Avoid any walking or placing of objects on the paver surface until the sealant has fully cured, typically 24-48 hours.
- Regular Maintenance: Keep the surface free of dirt and debris with regular sweeping and occasional washing.
- Reapplication: Plan to reseal every 2-3 years, or as recommended by the sealant manufacturer, to maintain protection and appearance.
Common Mistakes to Avoid
- Skipping Cleaning: Failing to clean the pavers properly before sealing can lead to sealant trapping dirt and impurities.
- Sealing Wet Pavers: Always ensure the pavers are thoroughly dry to avoid sealant failure.
- Inappropriate Weather: Applying sealant in poor weather can result in bubbles, hazy finishes, or incomplete protection.
- Not Testing: Skipping the testing phase can lead to unexpected results in color and finish.

FAQ: How to Seal Pavers
Why Should I Seal My Pavers?
Sealing pavers is critical because it helps to protect them from harsh weather conditions, dirt, oil stains, and natural wear and tear. Sealing enhances the color and appearance of the pavers, ensuring they maintain their aesthetic appeal over time. It also provides a waterproof barrier, safeguarding against potential water damage and preventing weeds from growing in between the joints.
What Types of Sealers Can Be Used for Pavers?
When learning how to seal pavers, selecting the right sealer is essential. You can choose from acrylic sealers, urethane sealers, and penetrating sealers depending on the finish you desire. Acrylic sealers are popular for enhancing colors and providing a glossy finish. Urethane sealers offer excellent durability and long-term protection, while penetrating sealers are ideal for a natural look, as they soak into the paver surfaces without altering their appearance.
How Often Should Pavers Be Sealed?
Frequency depends on the type of sealer used and environmental conditions. Generally, it's recommended to reseal your pavers every 2-3 years. High-traffic areas may require more frequent applications. Keep an eye on the surface – if water stops beading on the surface, it’s a sign that it's time to reseal.
Can I Seal My Pavers Myself, or Should I Hire a Professional?
You can definitely seal your pavers yourself, especially if you enjoy DIY projects. However, hiring a professional might be worth considering for large areas, intricate designs, or if you're unsure of the process. A professional will have the expertise and tools to ensure a uniform application and avoid mistakes like over-application or missed spots.
When Is the Best Time to Seal Pavers?
The best time to seal pavers is when the weather is dry and mild. Avoid sealing in extremely hot temperatures or when there is a forecast for rain within 24 hours, as moisture can affect the curing process. Ideally, seal your pavers during the spring or fall when temperatures are moderate.
How Much Does It Cost to Seal Pavers?
The cost of sealing pavers varies based on the area size, type of sealer used, and whether you hire a professional. DIY methods might cost between $0.10 to $0.30 per square foot for materials, while professional sealing services could range from $1 to $3 per square foot.
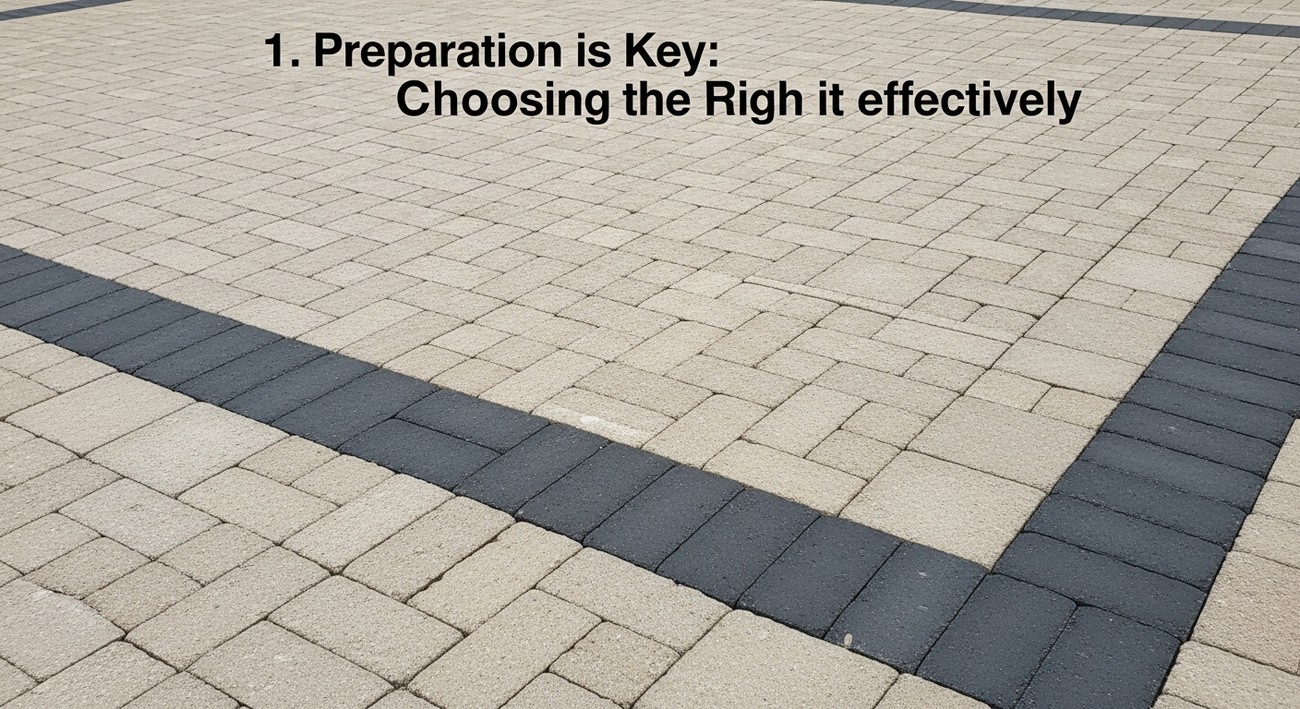
How Do I Prepare Pavers for Sealing?
Proper preparation is essential for effective sealing. Start by cleaning the pavers thoroughly to remove any dirt, oil stains, or mold. Power wash the surface to ensure it's clean. Allow the pavers to dry completely before applying the sealer. Repair any damaged areas and re-sand joints if necessary to fill gaps, which ensures that the sealer bonds properly.
Can I Seal Newly Installed Pavers Immediately?
It's advisable to wait a few months before sealing newly installed pavers. This allows any efflorescence, a white chalky substance, to appear naturally and be cleaned off. Waiting ensures the sealer adheres properly and doesn’t trap any moisture.
What Tools Do I Need to Seal Pavers?
For sealing pavers, you'll need a pressure washer for cleaning, a sprayer or roller for applying the sealer, and a clean broom to sweep off debris. Additionally, protective gear such as gloves and goggles may be necessary to ensure safety during the application process.
How Do I Apply Sealer to Pavers?
Applying sealer involves several steps. Begin by ensuring the pavers are clean and dry. Using a roller or prefered sprayer, apply the sealer evenly across the surface, starting from one corner and working methodically to avoid overlap marks. Allow the first coat to dry for 2-4 hours before applying a second coat if necessary. Always follow the manufacturer’s guidelines for drying times and application instructions for best results.
What Should I Do If My Pavers Become Cloudy After Sealing?
If your pavers become cloudy, it could be due to moisture trapped beneath the sealer. The most straightforward solution is to strip the sealer using a paver sealant stripper and then reapply the sealer after ensuring the pavers are thoroughly dry. Cloudiness can also result from over-application, so ensure future applications are thin and even.
How Can I Maintain Sealed Pavers?
To maintain sealed pavers, regularly sweep off debris and rinse them with water. For stubborn stains, use a mild detergent and scrub gently with a soft brush. Avoid harsh chemical cleaners that can break down the sealer prematurely. Periodically check for signs of wear and plan for resealing to keep your pavers in excellent condition.
Step-by-Step Guide
Tools/Materials Needed
- Pressure washer or hose with a spray nozzle
- Broom
- Paver sealer (water-based or solvent-based)
- Paint roller or sprayer
- Paint tray
- Joint sand (if needed)
- Protective gloves
- Safety goggles
Preparation Steps
Choose the Right Sealer: Start by selecting the appropriate sealer for your pavers. Water-based sealers are easy to apply and environmentally friendly, while solvent-based sealers offer deeper penetration and a glossy finish. Consider the desired look and environmental conditions of your area.
Check the Weather: Seal on a dry day with temperatures between 50°F to 90°F. Avoid sealing during extreme temperatures or when rain is forecasted within 24 hours.
Clean the Surface: Use a pressure washer or hose with a spray nozzle to remove dirt, grime, and stains. If there are stubborn stains, use a paver cleaner. Wait until the pavers are completely dry before proceeding.
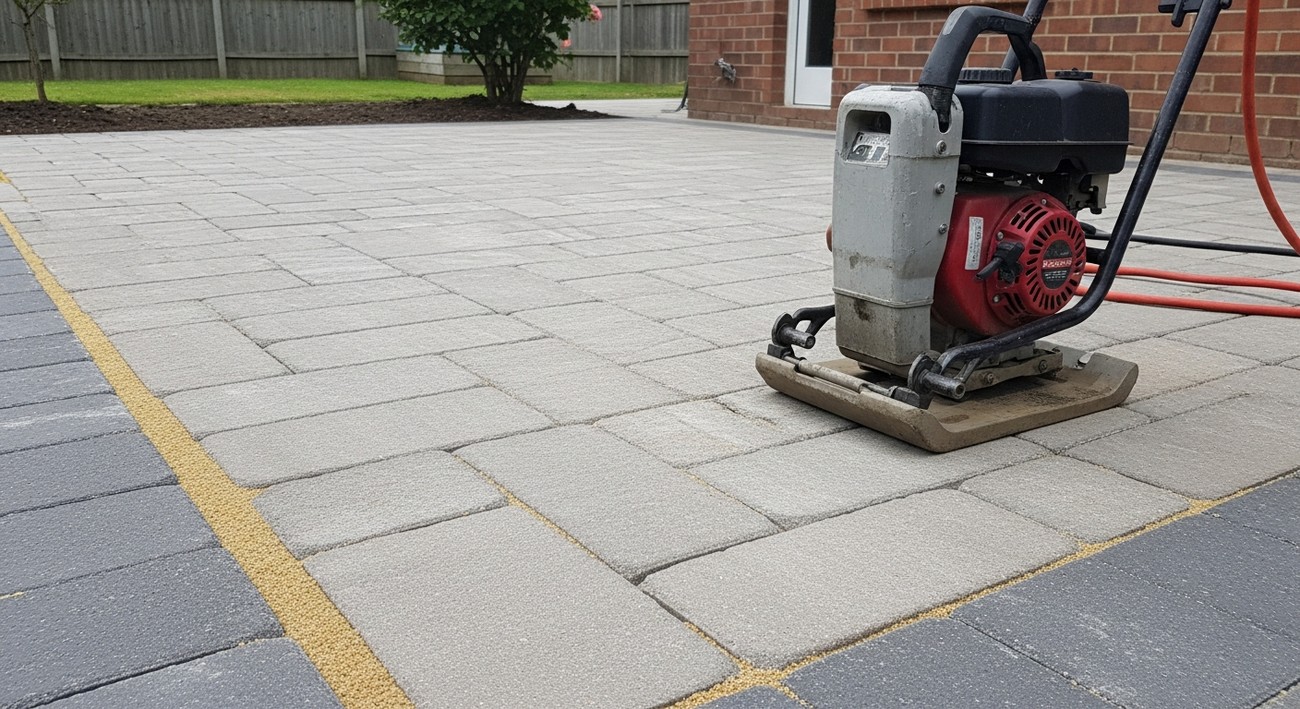
Re-sand Joints (if necessary): If your paver joints have spaces or loose sand, sweep in some new joint sand. This step is crucial for structural integrity and an even seal.
Move Furniture and Obstacles: Clear the pavers of any furniture, planters, or obstacles to ensure an even application of the sealer.
Detailed Instructions
Wear Protective Gear: Ensure you wear protective gloves and safety goggles to protect yourself from the sealer's fumes and potential skin contact.
Pour Sealer into a Paint Tray: Pour a generous amount of sealer into a paint tray. This will make it easier to load your roller evenly.
Begin Application at the Farthest Point: Starting at the end farthest from your exit point ensures you don’t walk on freshly sealed pavers.
Apply the Sealer with a Roller or Sprayer:
- Using a Roller: Dip the roller into the sealer and apply an even coat over the pavers. Make sure to cover all areas, including the gaps between pavers.
- Using a Sprayer: Hold the sprayer approximately one foot above the surface and apply in steady, overlapping motions.
Pay Attention to Edges and Corners: Use a brush to reach difficult areas like edges or corners that the roller or sprayer might miss.
Apply a Second Coat: Most paver sealers require at least two coats for optimal protection. Allow the first coat to dry according to the manufacturer’s instructions, then apply a second coat.
Drying Time: Allow the sealer to cure for at least 24-48 hours before walking on the surface. Avoid driving or placing heavy objects on sealed pavers for 48-72 hours.
Tips for Success
- Test First: Apply the sealer to a small, inconspicuous area first to ensure you are satisfied with the look and finish.
- Consistent Coverage: Ensure even application by maintaining a steady hand with the sprayer or roller. Overlapping ensures no patches are missed.
- Maintain Pavers: Clean sealed pavers regularly to maintain their appearance and durability.
What to Do if Something Goes Wrong
- Sealer Turns White or Hazy: This often occurs due to moisture being trapped under the sealer. Allowing more drying time before application can prevent this. To fix, strip the sealer with a recommended stripper, let it dry completely, and then reapply the sealant.
- Uneven Appearance: This may result from inconsistent application. Applying an additional thin coat can even out the appearance.
- Sealer Peels: Over-application or improper surface preparation can cause peeling. Remove the peeling sealer, ensure the pavers are clean and dry, and reapply.
Common Mistakes to Avoid
Not Cleaning the Pavers Thoroughly
One common mistake is not cleaning the pavers thoroughly before applying the sealant. Dirt, grease, or other residues on the paver surface can prevent the sealant from adhering properly. This often occurs due to underestimating how much grime can accumulate on the surface or rushing the prep work.
How to Avoid: Make sure to wash the pavers with a power washer or a cleaning solution specifically designed for pavers. Allow the surface to dry completely, as moisture trapped beneath the sealant can cause cloudiness.
If Already Made: If you've sealed over dirt, you'll need to remove the sealant, which might involve resealing. Use a sealant stripper and scrub the old layer off. Then, clean the pavers thoroughly before reapplying the sealant.
Expert Recommendation: Incorporate a routine cleaning schedule for your pavers to reduce the buildup of dirt and maintain the sealant's effectiveness longer.
Sealing Too Soon After Installation
Applying sealant too soon after installing pavers can trap moisture, leading to white hazing or even degradation of the pavers over time. This mistake typically arises from a desire to protect and finish the project quickly.
How to Avoid: Allow new pavers to settle and cure for at least 1-3 months to let them adjust and release moisture naturally.
If Already Made: If moisture causes hazing, you may need to remove the sealant using a stripper and then allow adequate curing time before resealing.
Expert Recommendation: Always consult the manufacturer's guidelines on the appropriate timeline for sealing new pavers.
Using the Wrong Type of Sealant
Choosing the wrong sealant for your specific type of pavers can result in poor adhesion or undesired appearance, such as gloss on a matte paver. This problem often occurs due to misunderstanding the compatibility between sealant and paver material.
How to Avoid: Ensure you know the material of your pavers and select a sealant that is specifically designed for it, whether it's for concrete, clay, or another type. Look for recommendations from the paver or sealant manufacturer.
If Already Made: Depending on the type of sealant used, you may need to remove it with the appropriate stripping product and then reseal with the correct one.
Expert Recommendation: When in doubt, consult with a professional or the manufacturer to match the right sealant to your pavers.
Over-application of Sealant
Applying too much sealant can lead to a build-up or uneven finish, which not only looks bad but can also become slippery, creating a safety hazard. This mistake usually happens when trying to ensure complete coverage.
How to Avoid: Apply the sealant in thin, even coats and allow proper drying time between layers. Use a sprayer or roller designed for even application.
If Already Made: If you've over-applied, a solution is to strip the excess with a sealant remover and reapply carefully. For minor excess, sometimes lightly sanding can help even it out.
Expert Recommendation: Experiment on an inconspicuous area first to gauge the proper amount of sealant needed.
Ignoring Weather Conditions
Applying sealant in inappropriate weather conditions can lead to poor drying and curing. Issues arise because temperature and humidity directly affect how the sealant sets.
How to Avoid: Monitor the weather closely; apply sealant when the temperature is between 50°F and 90°F, with no rain expected for at least 24 hours.
If Already Made: If the sealant has been compromised by weather, it may not adhere properly. In most cases, it's best to remove it once dry, then reapply under better conditions.
Expert Recommendation: Prioritize a dry, mild day for sealing and begin in the morning to maximize daylight for proper drying.
Failing to Maintain Sealed Pavers
Neglecting ongoing maintenance can lead to decreased longevity of the sealing job. This is often just an oversight, thinking the sealant will last indefinitely without care.
How to Avoid: Implement a maintenance routine that includes regular cleaning and spot checks to address minor issues before they escalate.
If Already Made: If wear and tear become apparent, consider doing touch-up sealant applications on the affected areas before they worsen.
Final Thoughts
Sealing pavers is an essential step to enhance the lifespan and beauty of your outdoor surfaces, protecting them from stains, moisture, and daily wear and tear. By regularly applying a sealant, you'll not only maintain the vibrant colors of your pavers but also prevent growth from weeds and moss, ensuring your patio or walkway looks its best for years to come.
If you're ready to take the plunge and learn how to seal pavers effectively, we're here to help! At US Quality Construction of Lexington, we believe that every outdoor space deserves expert care and attention. Feel free to reach out to us for a consultation or to request a free estimate tailored to your needs. Let our team bring your vision to life and keep your pavers looking pristine in Lexington, KY.
Tags: seal pavers, driveway maintenance, patio installation,


