


When it comes to home improvement projects that combine aesthetics with functionality, building a deck is often at the top of the list. However, behind every great deck lies meticulous planning and strong deck framing. This backbone of your outdoor space ensures durability, safety, and longevity. In this comprehensive guide, we'll delve into the essential components of deck framing—from choosing materials to step-by-step construction techniques.
Understanding Deck Framing Basics
At its core, deck framing is the support structure that bears the weight of your deck. It's like the skeleton of your deck, providing stability and shape. With proper framing, your deck can withstand weather conditions and frequent use, ensuring safety for you and your guests.
Essential Tools and Materials
Before diving into the construction phase, you’ll need an arsenal of tools and materials. Here’s a bullet list for easy reference:
Tools:
- Circular saw
- Power drill
- Spirit level
- Speed square
- Tape measure
Materials:
- Pressure-treated lumber
- Galvanized screws and nails
- Joist hangers
- Ledger board
- Concrete footings or piers
Having the right tools and materials at hand will streamline the building process and ensure precise framing.
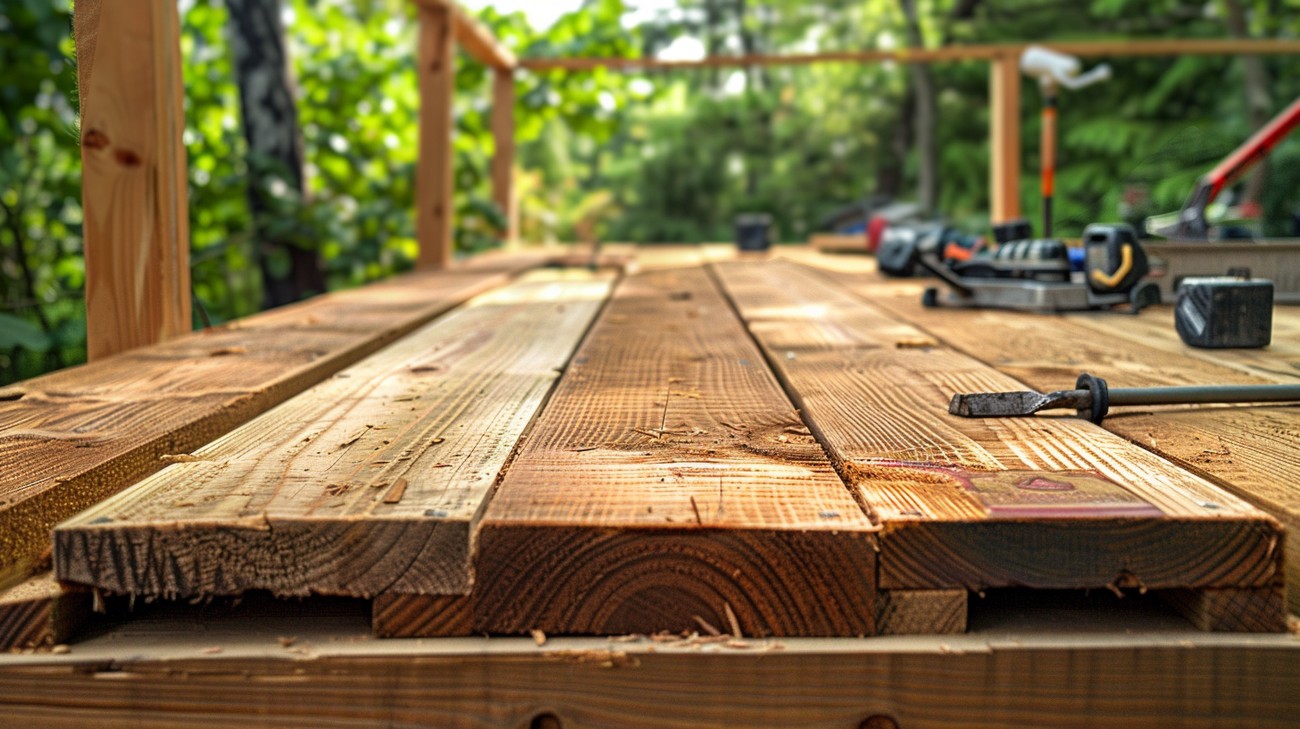
Selecting the Right Lumber
Choosing the appropriate type of wood is crucial for deck framing. Most builders opt for pressure-treated lumber due to its durability and resistance to insects and rot. This lumber is infused with chemical preservatives that extend its lifespan, making it an excellent choice for outdoor applications.
When selecting your wood, consider its grade, moisture content, and size. A higher-grade, kiln-dried lumber will be more stable and resistant to warping. Aim for lumber that is straight, has minimal knots, and features a smooth surface.
Planning Your Deck Design
Creating a detailed plan is the cornerstone of any successful deck project. You need to consider factors like the purpose of your deck, its size, and its location.
Start by measuring the area where your deck will be constructed. Ensure compliance with local building codes, which will dictate requirements like deck height, railing specifications, and stair dimensions.
Next, sketch a rough layout to visualize the deck's shape and structure. This can be as simple as a rectangular platform or a more intricate multi-level design. Remember, comprehensive planning minimizes errors during construction and helps with budgeting.
Laying the Foundation: Footings and Piers
A solid foundation is paramount for sturdy deck framing. Start by marking the location of your footings based on your sketch. Footings are usually made of concrete and spread the weight of the deck evenly to the ground.
Pour Concrete Footings:
- Dig holes for your footings using a post hole digger.
- Ensure the holes are below the frost line, a depth that prevents ground freezing from affecting your deck's stability.
- Pour concrete into the holes, inserting pier supports while the concrete is still wet.
Install Piers:
- Once the concrete has cured, place piers on top of your footings.
- Use a spirit level to ensure each pier is perfectly level, adjusting as necessary.
Attaching the Ledger Board
The ledger board is a critical component that attaches the deck to your house. It provides the necessary stability by connecting directly to your home’s structure.
Position the Ledger Board:
- Hold the board flush against the outer wall of your home at the desired deck height.
- Check that the board is level and mark drill points.
Secure the Ledger Board:
- Use galvanized lag bolts to attach the board securely. Pre-drill holes to avoid splitting the wood.
- Ensure waterproofing by installing flashing above the ledger board. This prevents water infiltration, reducing the risk of rot.
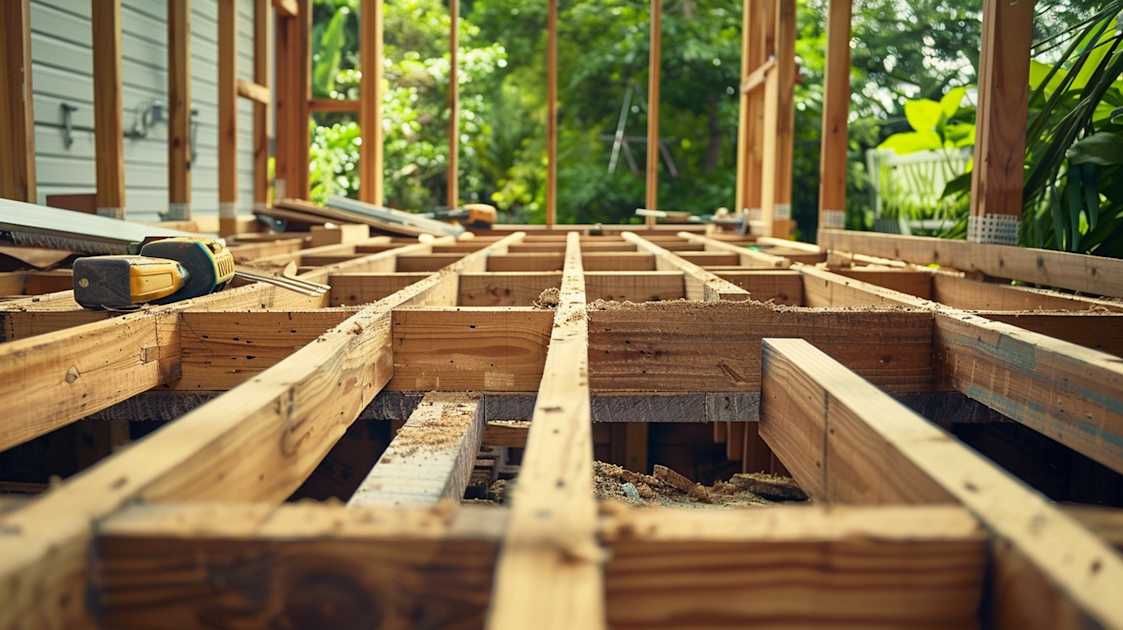
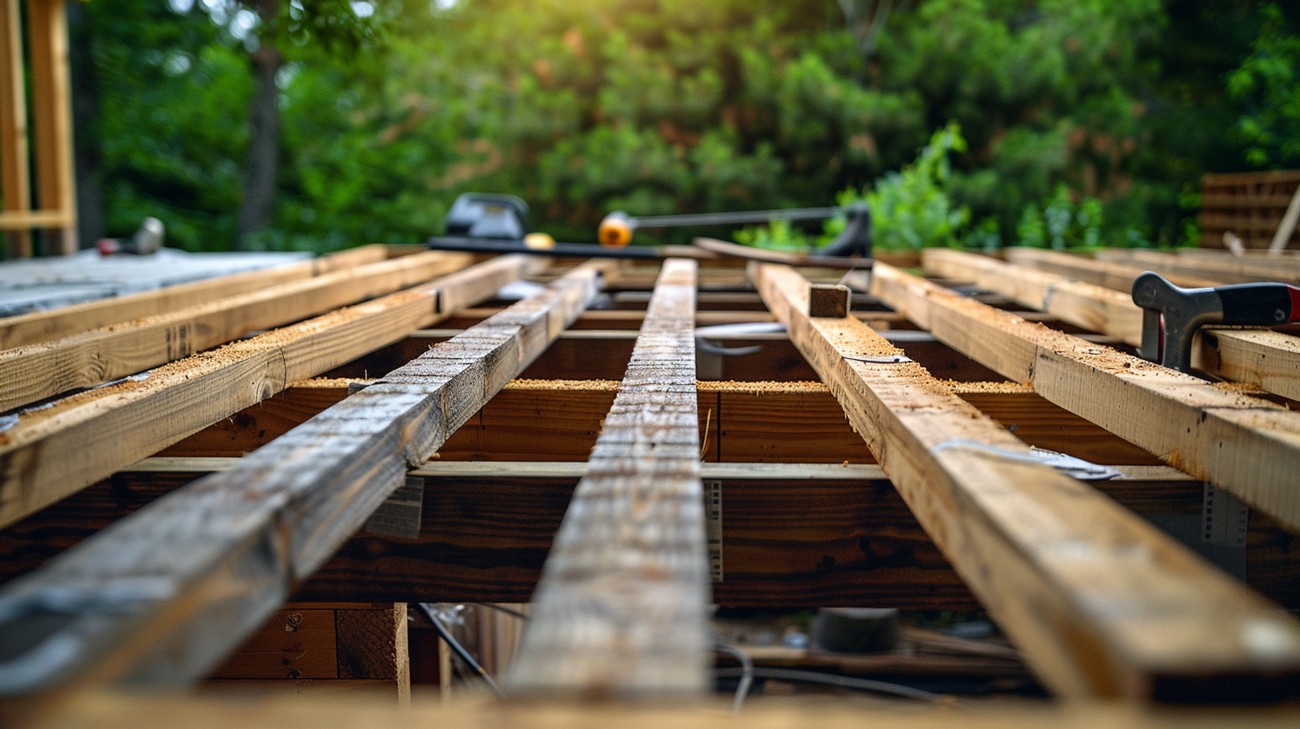
Assembling the Deck Joists
Joists run perpendicular to the ledger board and support the decking boards. Proper joist installation will guarantee the deck can handle the weight and traffic.
Space Your Joists:
- Measure and mark joist spacing, typically between 12 to 16 inches apart.
- Use joist hangers for attachment, ensuring each joist is flush with the ledger board.
Cut Joists to Length:
- Use a circular saw to cut each joist to the correct length.
- Triple-check measurements to ensure each joist fits snugly and evenly.
Installing Support Beams
Support beams provide critical structural reinforcement. These horizontal boards run beneath joists and distribute the deck’s load to the footings.
- Position and Attach Beams:
- Beams should be placed according to your deck design, often spanning several footing locations.
- Secure beams using galvanized bolts, ensuring alignment for consistent height across the deck.
Deck Framing Best Practices
Crafting a reliable deck frame requires adherence to best practices. Here are some essential tips to ensure high-quality results:
Ensure Proper Drainage: Slope the finished deck surface slightly away from your home to encourage drainage and prevent water accumulation.
Maintain Even Spacing: Consistent joist spacing supports uniform weight distribution and prevents sagging over time.
Regular Inspections: Even after completion, periodically inspect your framing for signs of wear or damage, especially after severe weather conditions.
FAQ Section about Deck Framing
Why is deck framing important in deck construction?
Deck framing is the backbone of any deck project. Without a solid frame, your deck may not support the weight or withstand the elements over time. Proper deck framing ensures that your deck is level, stable, and durable. It's the structure that holds everything together and creates a safe environment for you and your family to enjoy outdoor living. Planning and constructing your deck framing with precision can prevent structural issues and potential safety hazards down the line.
What materials are commonly used in deck framing?
Typically, deck frames are constructed from pressure-treated lumber, which resists rot and insects. Other options include cedar, redwood, and composite materials, each offering distinct advantages in terms of durability and aesthetics. Steel is also becoming popular for its strength and longevity, especially in areas with extreme weather conditions. Selecting the right material depends on your budget, environmental conditions, and the overall design of your deck.
How should I determine the size of my deck framing?
The size of your deck framing largely depends on the intended use and the space available. You'll need to consider factors such as the load-bearing requirements, the number of people it will accommodate, and any additional features like built-in seating or planters. A thorough site evaluation will help you establish an appropriate size. It's also crucial to consult local building codes and regulations to ensure compliance, as they will dictate specific dimensions and spacing requirements.
How can I ensure my deck frame is level?
Ensuring your deck frame is level is critical for both aesthetics and safety. Start by setting up ledger boards and check their level with a spirit level. As you install the beams and joists, use string lines and a laser level to maintain consistency. Regularly check and adjust as needed while building to avoid any dips or uneven sections. Taking these steps will prevent pooling water or uneven surfaces that could lead to structural issues over time.
What are joists, and how do they function in deck framing?
Joists are an integral part of deck framing. They are horizontal support beams that provide structure to the deck surface, running perpendicular to the beams. Joists are essential for distributing weight evenly across the deck and providing a strong foundation for decking boards. Spacing is crucial when installing joists to avoid sagging and to ensure the deck can support the intended load. Proper joist installation is key to a sturdy and long-lasting deck.
How do I choose the right fasteners for my deck frame?
Choosing the right fasteners is essential for the longevity and stability of your deck frame. Corrosion-resistant fasteners, such as stainless steel or hot-dipped galvanized nails and screws, are typically recommended. These materials withstand weather elements and prevent rusting. Selecting suitable fasteners also depends on the decking materials; for instance, specialized screws are available for composite decking that avoids splitting and create a cleaner finish.
Are there specific building codes for deck framing I should be aware of?
Yes, building codes for deck framing are imperative and vary by location. They cover aspects such as joist spacing, beam size, footer depth, and railing requirements. These codes ensure safety and structural integrity. It's important to contact your local building authority to understand the specific requirements in your area before commencing construction. Adhering to these guidelines not only safeguards against potential legal issues but also ensures a safe and robust deck structure.
How can I design deck framing to accommodate future changes or expansions?
When planning deck framing, considering potential future changes can save time and money. Use modular designs that allow for easy modification, such as adding additional sections or features like staircases. Over-build your frame slightly to manage extra loads from possible future extensions. Providing adequate spacing and structural support in the initial design also facilitates future adaptions with minimal disruption.
How do I protect my deck framing from moisture and rot?
One effective way to protect your deck framing from moisture is by using pressure-treated lumber, which is specifically treated to withstand damp conditions and termite attacks. Applying a protective sealant or wood preservative to exposed wood surfaces can further extend the frame's lifespan. Proper water drainage systems should be incorporated to prevent standing water and moisture buildup. Regular maintenance, including thorough cleaning and inspections, will also help identify and address potential issues early.
What challenges might I encounter when planning deck framing on uneven terrain?
Building deck framing on uneven terrain presents challenges such as ensuring a level structure while accommodating slope variations. You might need to dig deeper footings on one side or use varying post lengths to maintain an even deck surface. It often involves additional planning and materials to handle the grade changes, but the result is reachable with careful design. Engaging with a structural engineer can provide insights into effective support strategies and code requirements for such landscapes.
Step-by-Step Guide
Tools/Materials Needed
- Circular saw
- Tape measure
- Carpenter's level
- Hammer or nail gun
- Drill with bits
- Post-hole digger
- Speed square
- Chalk line
- Framing square
- Safety goggles and gloves
- Treated lumber (posts, beams, joists)
- Galvanized joist hangers and nails
- Concrete mix
- Metal rebar
- Post anchors
- Ledger board and lag screws
Preparation Steps
Check Local Building Codes: Determine the requirements for deck construction in your area. This may include permits, inspections, and specific measurement standards.
Design Your Deck: Create or obtain a plan that includes dimensions, post locations, and ledger board placement. Consider size, shape, and features like stairs or rails.
Choose a Location: Identify the best location for your deck. Consider access points from your home and ground slope.
Mark the Perimeter: Use stakes and string to outline where your deck will go, marking the perimeter and identifying post locations.
Detailed Instructions
Install the Ledger Board:
- Attach the ledger board securely to your house, ensuring it’s level using the framing square.
- Drill pilot holes and secure it with lag screws. Seal any gaps to prevent water penetration.
Dig Post Holes:
- Use the post-hole digger to create holes for your deck posts. They should be at least 2 feet deep or below the frost line in your area.
- Fill the bottom with gravel before setting the posts.
Set the Posts:
- Place treated posts into the holes. Ensure they’re plumb with a carpenter's level.
- Pour concrete into the holes around each post, inserting metal rebar for added strength. Allow it to set.
Attach Post Anchors:
- Once the concrete cures, attach metal anchors to the bottoms of your posts to enhance stability.
Install Beams:
- Lay beams across the posts using metal connectors. Check for level accuracy consistently as you work.
Set Up Joists:
- Use galvanized joist hangers attached to the ledger board to begin laying your joists.
- Space them 16 inches apart and secure them with nails or screws.
- Double-check the alignment and level of each joist with the speed square.
Add Blocking:
- Install perpendicular blocking between joists every 4-6 feet to prevent twisting.
Inspect Your Work:
- Look for any inconsistencies in framing, such as misaligned or loose members. Make necessary adjustments.
Tips for Success
- Quality Materials: Opt for high-quality, pressure-treated lumber to prevent rot and increase the lifespan of your deck.
- Double-check Levels: Always ensure posts, beams, and joists are level at each stage of construction.
- Safety First: Wear protective gear such as safety goggles and gloves during every construction phase.
- Consider Drainage: Plan for proper water drainage by sloping your deck slightly away from the house.
What to Do if Something Goes Wrong
- Uneven Joists: If you find that some joists are not level, use shims to correct the height. Alternatively, plane down high joists carefully.
- Unstable Posts: Reinforce wobbly posts using additional concrete around the base or ensuring they’re secured with stronger metal brackets.
- Ledger Board Issues: If you suspect water is entering behind the ledger board, consider removing it, reinstalling with proper flashing, or installing a drainage membrane.
- Misaligned Beams: Adjustments can be made at the post connections. A small jack can help raise beams to the correct height.

Common Mistakes to Avoid
1. Incorrect Joist Spacing
Why it happens: Joist spacing errors often result from miscalculations or underestimating the structural demands based on decking material and load requirements.
How to avoid it: Consult the decking material guidelines and local building codes to determine the appropriate spacing, typically 12, 16, or 24 inches on center. Double-check measurements and consult professional guidelines if uncertain.
What to do if you've already made the mistake: If the deck is already built, additional joists can be inserted to meet the required spacing. Ensure these are properly attached to the ledger and rim joists. An engineer might offer advice on reinforcing misaligned spacing without removing the structure.
Expert recommendations: Use a joist spacing calculator for precise measurements and always err on the side of caution by opting for closer spacing if in doubt about the load.
2. Neglecting Proper Ledger Attachment
Why it happens: Rushing or a lack of understanding of its importance can lead to inadequate ledger board attachment, risking the deck's structural integrity.
How to avoid it: Secure the ledger board with lag screws or bolts into the house’s structural framing, never just the siding. Use a ledger flashing to prevent water infiltration.
What to do if you've already made the mistake: Reinforce the ledger with proper fasteners and verify it’s secured into the house’s framing. Adding joist hangers can also improve support.
Expert recommendations: Regularly inspect the ledger attachment as part of deck maintenance and consider professional help for critical structural fixes.
3. Failing to Allow for Wood Expansion and Contraction
Why it happens: Builders sometimes forget that wood naturally expands and contracts with weather changes, especially if they lack experience with deck framing.
How to avoid it: Follow guidelines for leaving appropriate gaps between deck boards (typically 1/8 to 1/4 inch) to allow for expansion.
What to do if you've already made the mistake: If boards are too tightly spaced, remove some to adjust and re-space them properly, but do so before weather affects the deck.
Expert recommendations: Purchase seasoned or kiln-dried lumber to minimize variable expansion, and check local climate recommendations for material behavior.
4. Overlooking Foundation Requirements
Why it happens: Improper foundation checks occur due to oversight or underestimation of soil conditions which affect post stability.
How to avoid it: Conduct a soil test to understand type and drainage before construction. Choose appropriate footings like concrete piers and posts below the frost line.
What to do if you've already made the mistake: Reassess the deck's support. It might be necessary to reinforce footings or install additional support posts.
Expert recommendations: Consult an engineer for soil-specific requirements and aim for deeper footings in climates with significant ground movement.
5. Using Inappropriate Fasteners
Why it happens: Budget constraints or convenience can lead to the use of the wrong fasteners that aren't suited for outdoor conditions.
How to avoid it: Use fasteners specifically rated for exterior use, such as stainless steel or hot-dipped galvanized screws and connectors, to prevent rust and decay.
What to do if you've already made the mistake: Replace inadequate fasteners with suitable ones to prevent long-term structural issues. If damage has begun, assess the affected areas for further repairs.
Expert recommendations: Invest in quality fasteners from the outset to avoid costly future repairs and ensure the longevity of your deck.
6. Ignoring the Need for Proper Drainage
Why it happens: Inadequate drainage planning is a common oversight, especially when builders focus solely on the deck's aesthetic.
How to avoid it: Plan for water runoff by incorporating slight slopes (about 1/8 inch per foot) and ensure proper spacing between boards.
What to do if you've already made the mistake: Add drainage solutions post-build, such as installing underdeck drainage systems or retrofitting slopes where possible.
Expert recommendations: Always design with drainage in mind and inspect for standing water regularly to avoid wood rot and structural damage.
7. Forgetting to Seal and Maintain
Why it happens: Overlooking maintenance, including sealing, often occurs because of a lack of awareness or time constraints. How to avoid it: Apply a sealant every 1-3 years depending on weather exposure and deck use to protect against moisture and UV damage. What to do if you've already made the mistake: Thoroughly clean the deck and apply a high-quality sealant. Address any wood damage prior to sealing.
Final Thoughts
Getting the deck framing right is essential to ensure your outdoor space is both functional and stylish. We’ve discussed important aspects like selecting quality materials, proper measurements, and adhering to local building codes, all of which contribute to a sturdy foundation that will last for years to come. Whether you're thinking of a simple upgrade or a complete renovation, investing time and resources into this initial stage can make a world of difference in the overall appeal and safety of your deck.
If you’re a homeowner in Lexington, KY, and are ready to transform your outdoor space, we’d love to help you bring your vision to life. Our team at US Quality Construction of Lexington is dedicated to providing high-quality deck framing solutions tailored to your needs. Feel free to reach out to us for a consultation or to request a free estimate — we’re here to guide you every step of the way!
Tags: wood, beams, construction,


